Gemini CLI Crash Course (FREE Claude Code Alternative)

Paying $200 USD for Claude Code is expensive.
The more I use the Gemini CLI, the more convinced I don't need the Claude Code $200/month plan to be a "cool kid".
Claude Code vs Gemini CLI: It's like comparing an iPhone and a high-end Android phone: they are pretty much the same, but the iPhone comes with a higher price tag.
Claude Code starts at $100/month. Gemini CLI is open source and has a generous free plan.
I’ll admit, Anthropic’s models feel a bit “sexier” for code generation. I like their UI, UX, and DX. But I can’t justify paying $200/month when Gemini performs just as well.
So, here’s a quick crash course to help you get the most out of Gemini CLI.
By the end, you’ll know how to:
- Install the Gemini CLI.
- Onboard it to a new codebase fast
- Write your first context file (
GEMINI.md) with project instructions (examples included) - Configure it for your needs
- Use the most common commands to speed up your workflow
Let's dive in!
Installation
You can install Gemini CLI in two main ways
My preferred method is with Homebrew
brew install gemini-cli
But you can also install it globally with npm
npm install -g @google/gemini-cli
Note: Make sure you’re using Node.js version 20 or higher. Otherwise, Gemini CLI may not install or run correctly.
Authentication
Once you’ve installed Gemini CLI, open your terminal, type:
gemini
and hit Enter.
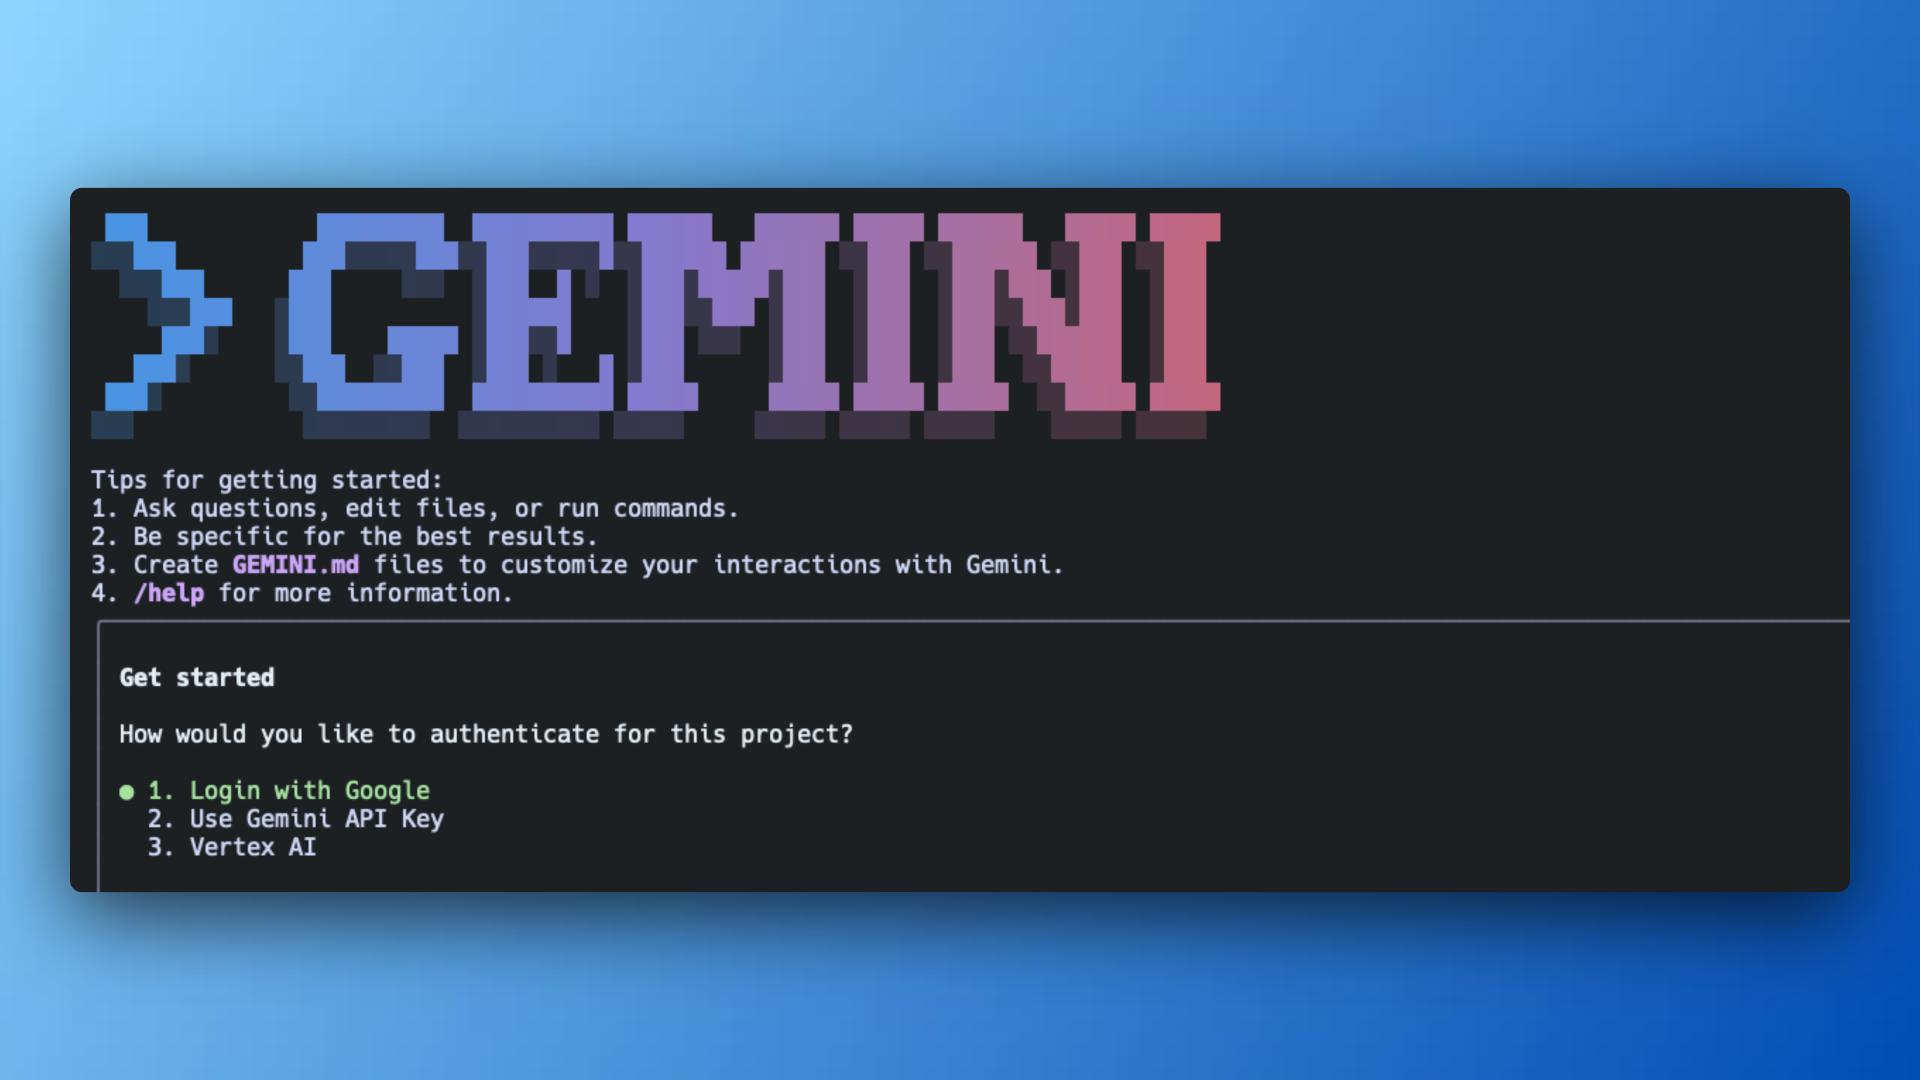
You’ll see an authentication prompt with three options:
- OAuth Login using your Google Account (recommended)
- Gemini API Key
- Vertex AI
Before you choose, I recommend visiting Google Code Assist and opting in with your personal Google account.
Then, go back to Gemini CLI and pick Option 1 (Login with Google).
The main benefit of opting in Google's Code Assist program is 1000 model requests per day. That's essentially free. So you might just take advantage (while it lasts?).
Note: The free Code Assist plan also includes a VSCode extension (similar to Cursor) and other handy tools, but that’s beyond the scope of this post..
If you’d rather authenticate with an API key:
- Go to Google AI Studio, and create a new API key
- In your terminal, run:
export GEMINI_API_KEY="YOUR_API_KEY"
- Select Option 2 (Use Gemini API Key).
This method gives you 100 requests per day, which is still generous.
Once you’re logged in, here’s what the Gemini CLI start screen looks like:
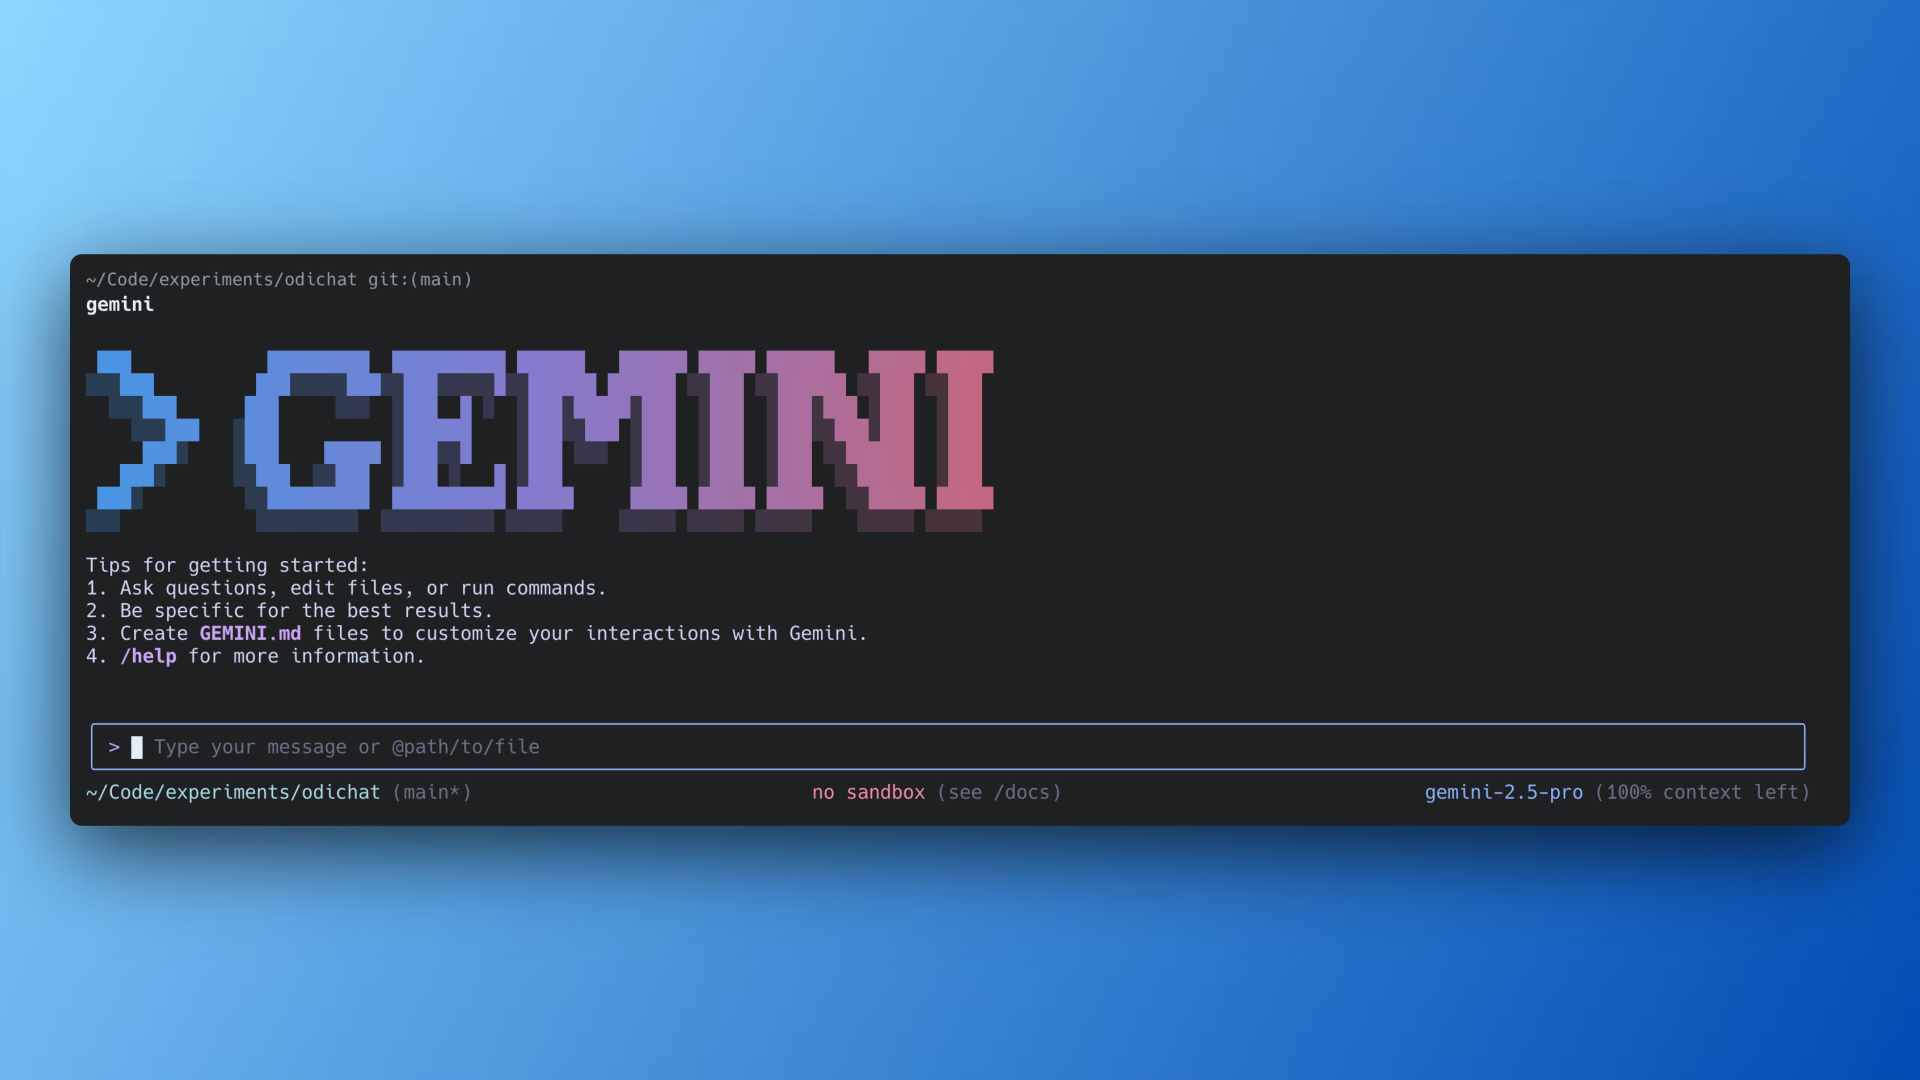
Great. You've successfully, installed the Gemini CLI. Ready to roll!
For the above example, I ran the gemini command inside the root directory of one of my projects, Odichat, a SaaS that helps small businesses integrate AI customer service agents in WhatsApp Business
You can run the gemini command anywhere in your file system and ask it to do anything you could do with bash, but in plain English. For example:
Delete all screenshots from my Desktop directory that are at least 3 month old.
That's a quick cheat code you can apply to declutter your Desktop or Downloads directory, which tends to get messy real quick...
Alright, let's test the waters with a real codebase.
Code onboarding with vanilla Gemini CLI
Let’s run our first prompt inside Odichat’s codebase to see how Gemini CLI works.
Imagine I’m new to this project and want a high-level overview.
I'd type:
I’m new to this codebase. Can you explain it to me?
The output gives us a quick summary:
- Main tech stack: Ruby on Rails
- What it does: Creates and integrates chatbots in WhatsApp
- Key parts: OpenAI API, Stripe
Pretty good for a first try.
We could keep using Gemini CLI as is, but as we dig into more complex parts of the codebase, the agent will start guessing, and those guesses can go off track fast.
That’s where customization comes in.
Customize your setup
1. Create a GEMINI.md file
GEMINI.md It is a special markdown file that Gemini automatically loads into context when you start a conversation.
It’s the perfect place to document:
- A short overview of the project
- Tech stack
- Code style rules
- Testing instructions
- Warnings or gotchas
- Any info you want Gemini to remember
There’s no required format. You can think of it as a context manifesto that the Gemini CLI agent will always keep in mind when working on your codebase.
You can create GEMINI.md manually, or have Gemini CLI analyze your current directory and generate one for you.
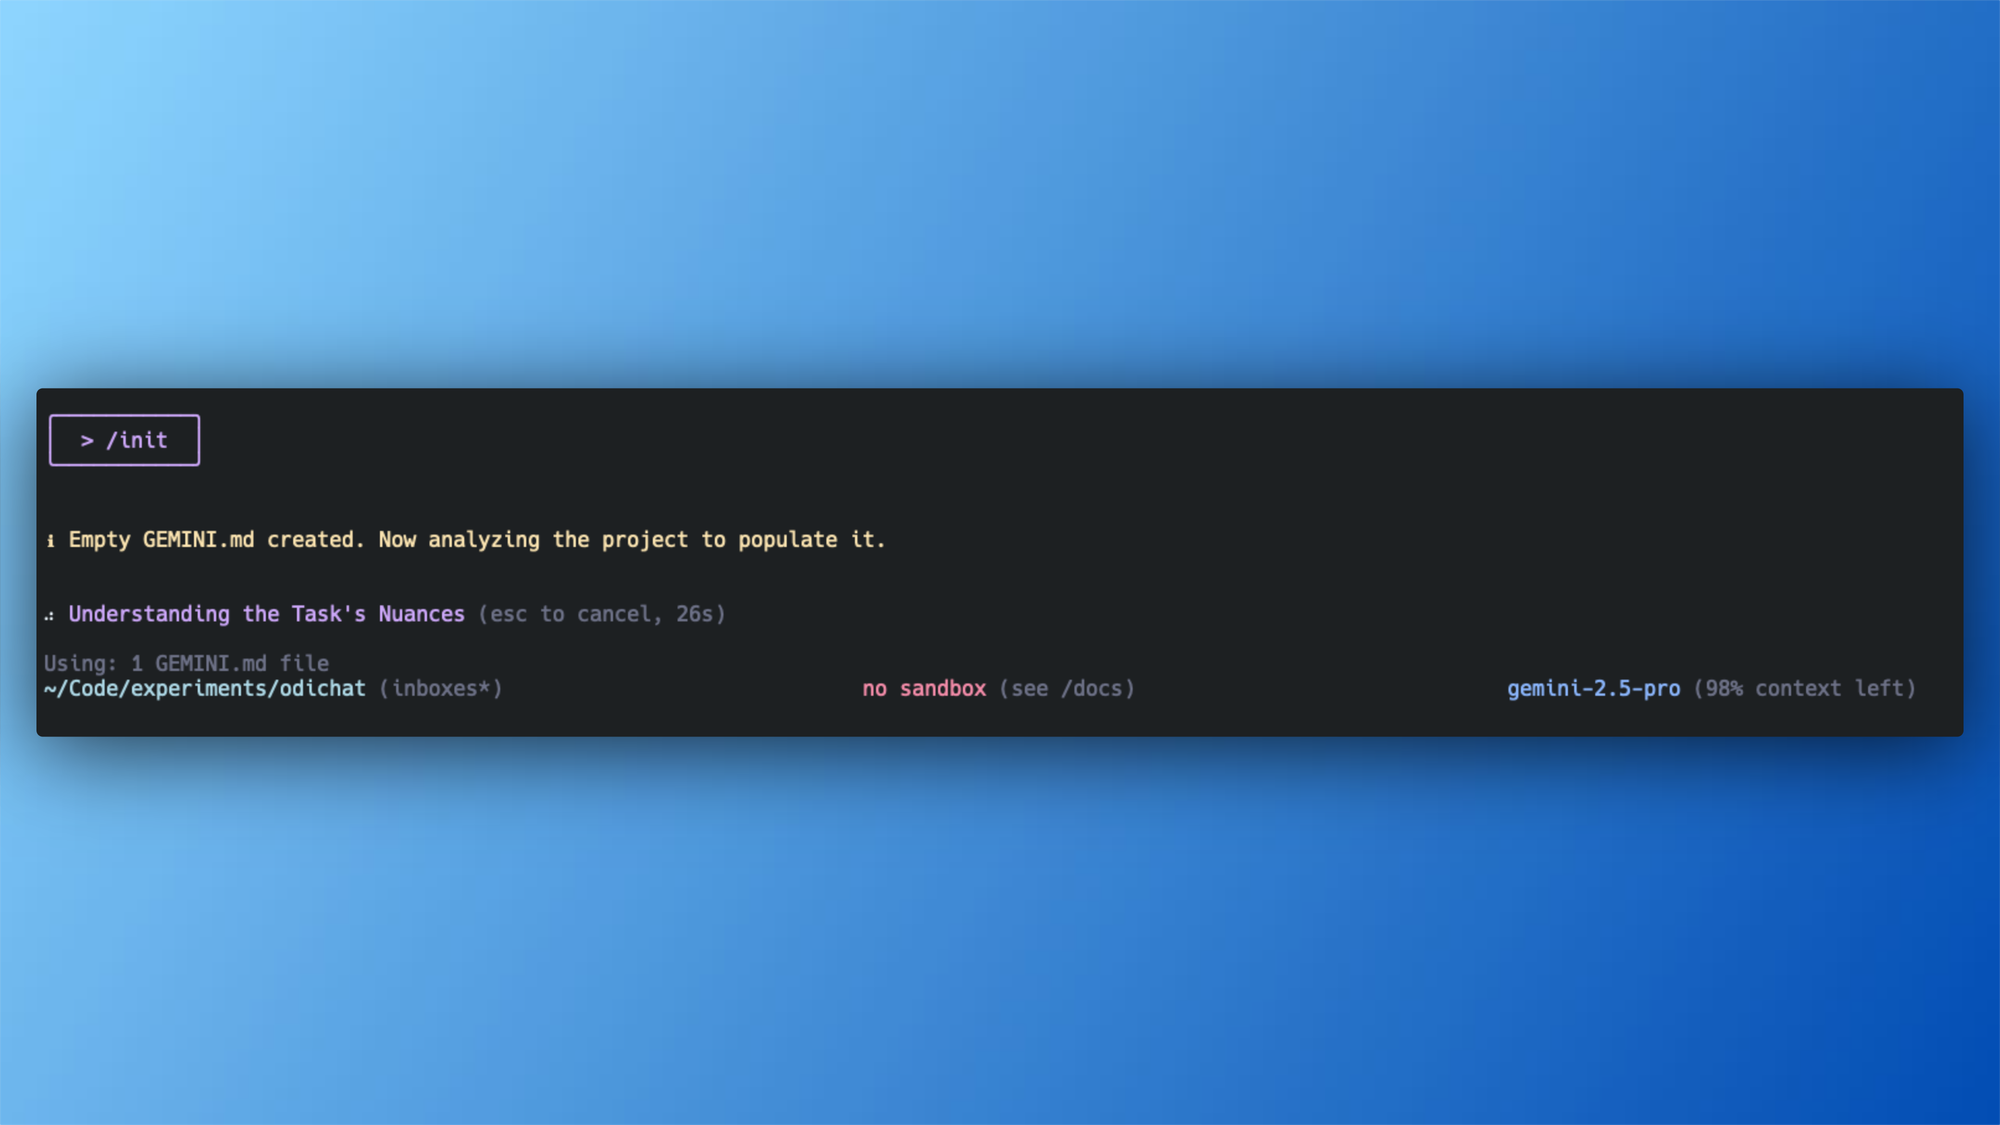
Here's the GEMINI.mnd I use in the root directory of Odichat's codebase
GEMINI.md file example
# Project Overview

Odichat is web platform that help users build "custom GPTs" that are integrated into WhatsApp Business using the WhatsApp Business API to automate FAQs such as hours of operation, location, product details, and price.

1. Users create an account
2. Create a chatbot
3. Upload propietary documents (TXT, HTML, DOCX, DOC, PDF) to train their chatbot
4. Tweak their chatbot system instructions (prompt)
5. Integrate to WhatsApp Business using the WhatsApp Embedded Signup flow

## Non-negotiable golden rules

- Whenever unsure about something that's related to the project, ask the developer for clarification before making changes. DO NOT write changes or use tools when you are not sure about something project specific, or if you don't have context for a particular feature/decision.
- Add/update AIDEV-NOTE: anchor comments near non-trivial edited code. DO NOT delete or mangle existing AIDEV- comments.
- For changes >300 LOC or >3 files, ask for confirmation. DO NOT refactor large modules without human guidance.

## Project Structure

Odichat is a Ruby on Rails 8 full-stack application that uses the conventional Ruby on Rails MVC pattern and folder structure. Odichat uses the following underlying technologies:

- Frontend: `.html.erb` files, Hotwire for reactivity and StimulusJS for JavaScript
- Backend: Heavy usage of Ruby on Rails 8 as much as possible
- Database: PostgreSQL as primary database and SQLite3 for the Cache, Cable and Queue database in all environments
- Deployment: Kamal 2.0 in a Hetzner VPS

## Local Development
### Running the project

To run the project locally, use the following command:

`./bin/dev`

This will start the web server, a jobs server, the Tailwind CSS watcher, and a cloudflared tunnel.

### Running tests

To run the test suite, use the following command:

`rails test`

## Coding Standards & Framework Best Practices

- Adhere to Ruby on Rails MVC pattern and vanilla Rails folder structure
- Follow Rails conventions for naming and file organization
- Use Rails built-in testing tools (Minitest) for all test cases

### Rails Controllers

- Keep controllers thin, focused on HTTP concerns
- Use strong parameters for all user input
- Prefer redirect_to with notice/alert over render for form submissions
- Use before_action filters for authentication and shared setup
- Respond to appropriate formats (HTML, Turbo Stream, JSON)

### Rails Models

- Use Rails validations extensively to ensure data integrity
- Keep model callbacks minimal and consider service objects for complex logic
- Use scopes for common queries that return ActiveRecord::Relation
- Implement proper associations with dependent options
- Use ActiveRecord's `includes` method whenever possible to avoid N+1 queries

### Rails Views

- Use partials for reusable components
- Keep logic out of views, use view helpers or view objects when needed
- Follow Hotwire/Turbo conventions for dynamic page updates
- Use content_for to define regions of content in layouts
- Use Rails helpers appropriately (form_with, link_to, etc.)

## Key Gems

Odichat relies heavily on gems such as:

- `whatsapp_sdk` for interacting with the WhatsApp Business API
- `pay` and `stripe` for integrating Stripe payments and managing subscriptions
- `pundit` for authorization
- `devise` for authentication
- `ruby-openai` for interacting with the OpenAI API for consuming their AI models
- `aws-sdk-s3` and `image_processing` for ActiveStorage file uploads and file storage management

## Commit discipline

- Tag AI-generated commits: e.g., feat: optimise feed query [AI].
You can place the GEMINI.md file in different locations
- In the root of your project
- In any parent folder of the project
- In any subfolder inside the project
If Gemini finds more than one GEMINI.md, the one closest to the file you’re working on will take priority.
Advanced configuration (settings.json & env vars)
By now, you’re probably having fun using Gemini CLI, but you might also want more control over some of the default settings.
Gemini CLI has several configuration layers, but let’s apply the 80/20 rule and focus on the ones that matter most.
The three key configuration layers are:
- User settings: Global settings for your user account
- Project settings: Settings specific to a single project
- Environment variables: Settings loaded from
.envfiles
User Settings
When Gemini CLI is installed, it creates a user settings file in your home directory. For example:
~/.gemini/settings.json
Settings in this file apply to all Gemini CLI sessions for your current user, basically, anywhere in your home directory (~).
To open it in VS Code, run:
code ~/.gemini/settings.json
This file has many options you can tweak. Here are a few useful ones:
For a list fo all available settings refer to the Gemini CLI configuration docs
contextFileName: Sets the name for your context file. Default:GEMINI.md. You can change it toAGENTS.mdor anything you like. A shared name (likeAGENTS.md) is handy if you use multiple tools like Gemini CLI, Claude Code, or Cursor CLI.preferredEditor: The editor for viewing diffs. Default:vscode. Change it tocursor,vim,nvim, etc.hideTips: Turns CLI tips on or off. Default:true. Set it tofalseif you find them distracting.mcpServers: Lets you connect to one or more MCP servers to discover and use custom tools. Empty by default
Project settings
Project settings work the same way as user settings, but they let you override them per project. To do this, create a .gemini/settings.json file in the root directory of your project.
For example, here are my project-level settings:
// ~/.gemini/settings.json

{
  "selectedAuthType": "oauth-personal",
  "contextFileName": "AGENTS.md"
  "theme": "GitHub",
  "preferredEditor": "vscode",
}
When working in the Odichat codebase, I like to use the Context7 MCP to get up-to-date Ruby gems documentation.
// ~/Code/experiments/odichat/.gemini/settings.json

"theme": "Dracula"
"mcpServers": {
  "context7": {
    "command": "npx",
      "args": ["-y", "@upstash/context7-mcp"]
  }
}
This setup does two things:
- Overrides my default Gemini CLI theme with Dracula.
- Adds a Context7 MCP server that’s only active when I run
geminiin the Odichat project root.
Environment variables
The Gemini CLI automatically loads environment variables from an .env file in this order:
.envin the current working directory- If not found, it searches parent folders until it reaches the project root (where the
.gitfolder is) - If still not found, it checks the user’s home directory (
~/.env)
The two most common variables you’ll use are:
GEMINI_API_KEY– Required if you’re authenticating with API keysGEMINI_MODEL– Sets the Gemini model to use. I usually set this togemini-2.5-pro.
For the full list, see the Gemini CLI environment variables documentation.
Personal tip: It’s useful to know these configuration layers, but when you’re starting out, you’ll get more value from refining your context files (like GEMINI.md) than from tweaking settings.json and environment variables.
CLI Commands
Gemini CLI has several built-in commands to manage sessions, customize the interface, and control the agent’s behavior.
Commands start with a forward slash /, the @ symbol, or an exclamation mark !.
Slash commands
I don’t use all of them, but these are the ones I keep coming back to:
/auth– Authenticate your account/clear– Clear the terminal display/copy– Copy the last output to your clipboard/compress– Summarize a long chat to save tokens when you’re close to the context limit/help– Show Gemini CLI info and list available commands/quit– Exit Gemini CLI
Full list: Gemini CLI docs – Slash commands
At commands (@)
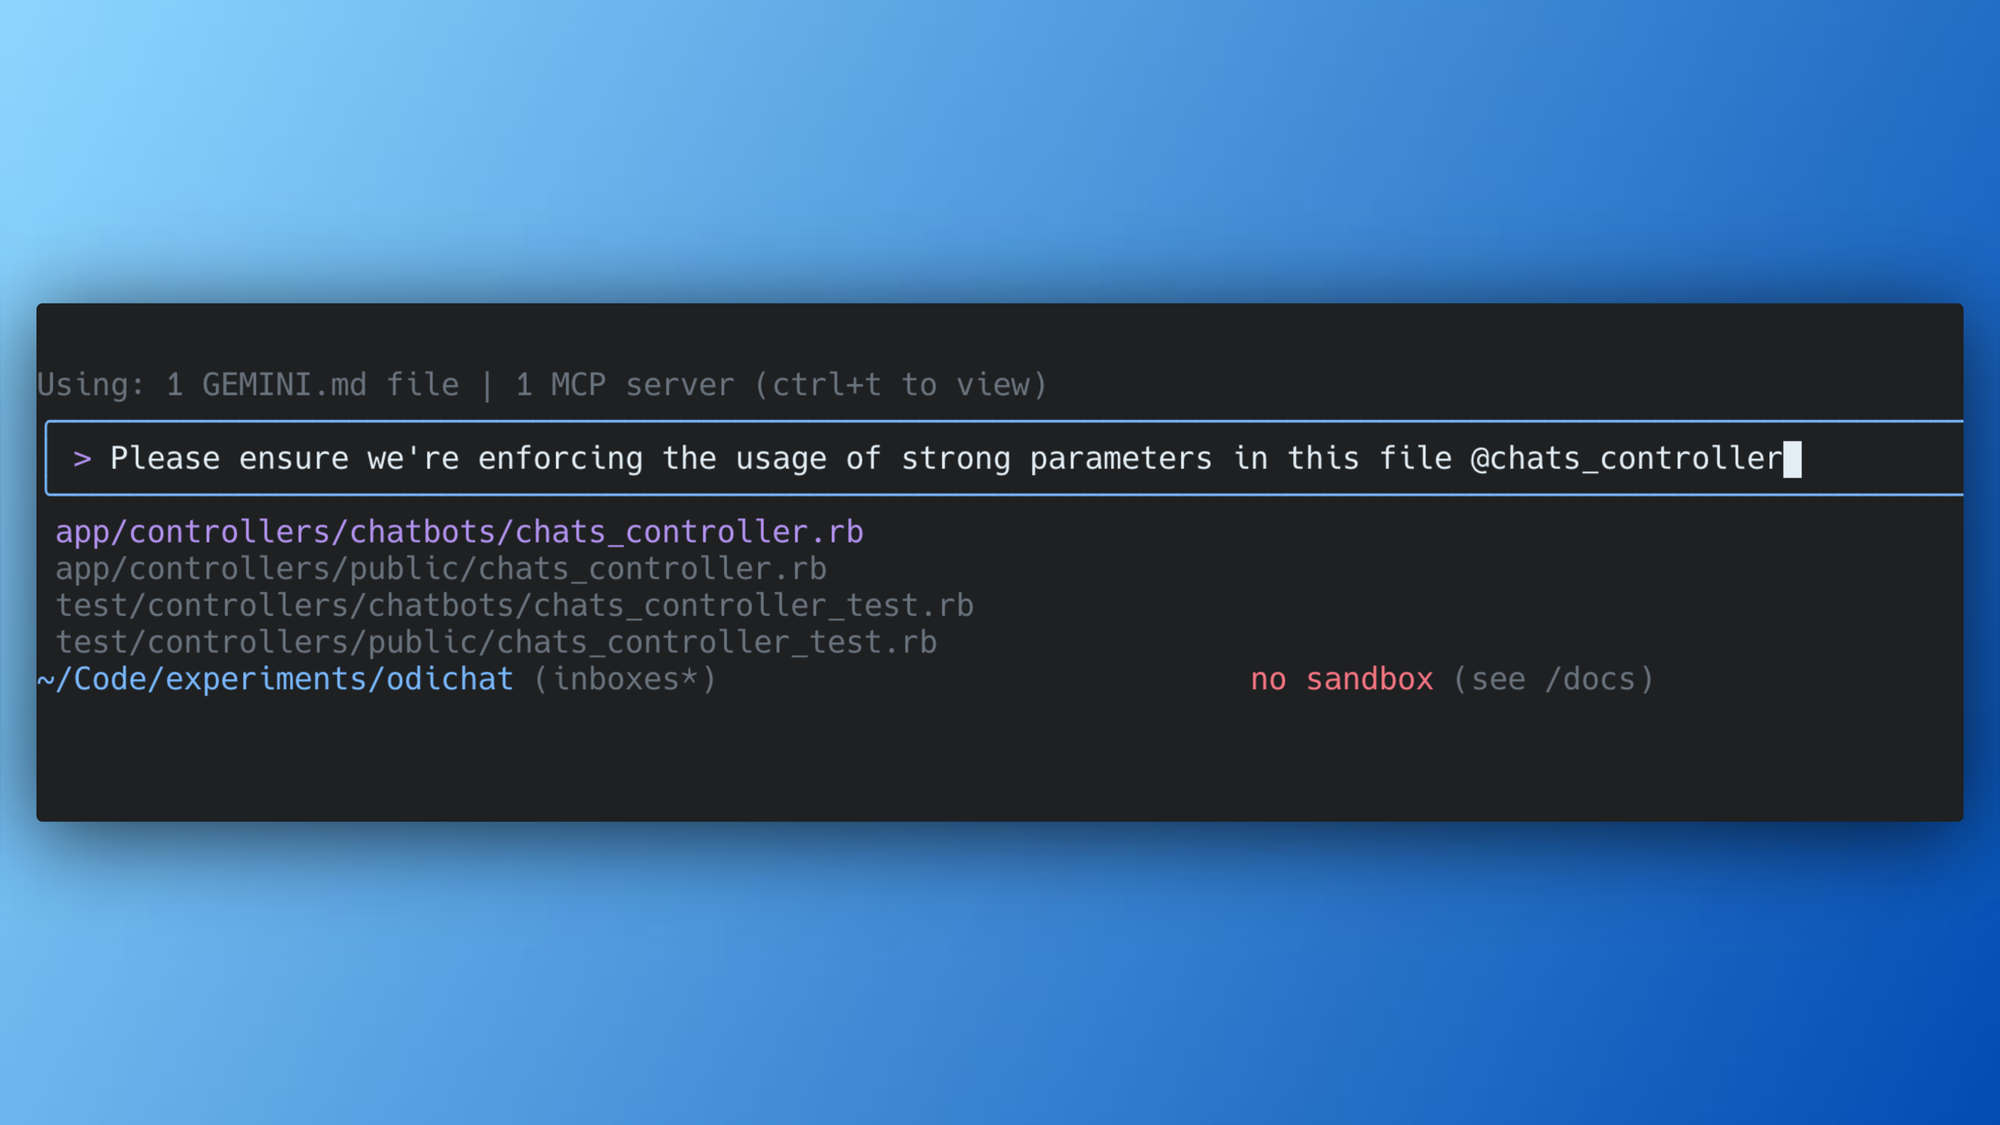
@ commands include the contents of files or directories directly in your prompt, and I use them all the time.
For example, let’s say I want Gemini CLI to make sure my ChatsController in a Ruby on Rails project enforces strong parameters. I could type:
Please ensure we're enforcing the usage of strong parameters in this file @chats_controller.rb
Shell mode commands (!)
Last but not least, the ! shell command is extremely useful. When I first started with Gemini CLI, I didn’t even know how to access my shell from inside it.
I usually keep my Warp terminal full screen, so I’d open a new tab just to run daily shell commands like git add .
I thought this was a limitation of Gemini CLI but it turns out I just didn’t know about the ! command.
Here’s how it works:
!ls
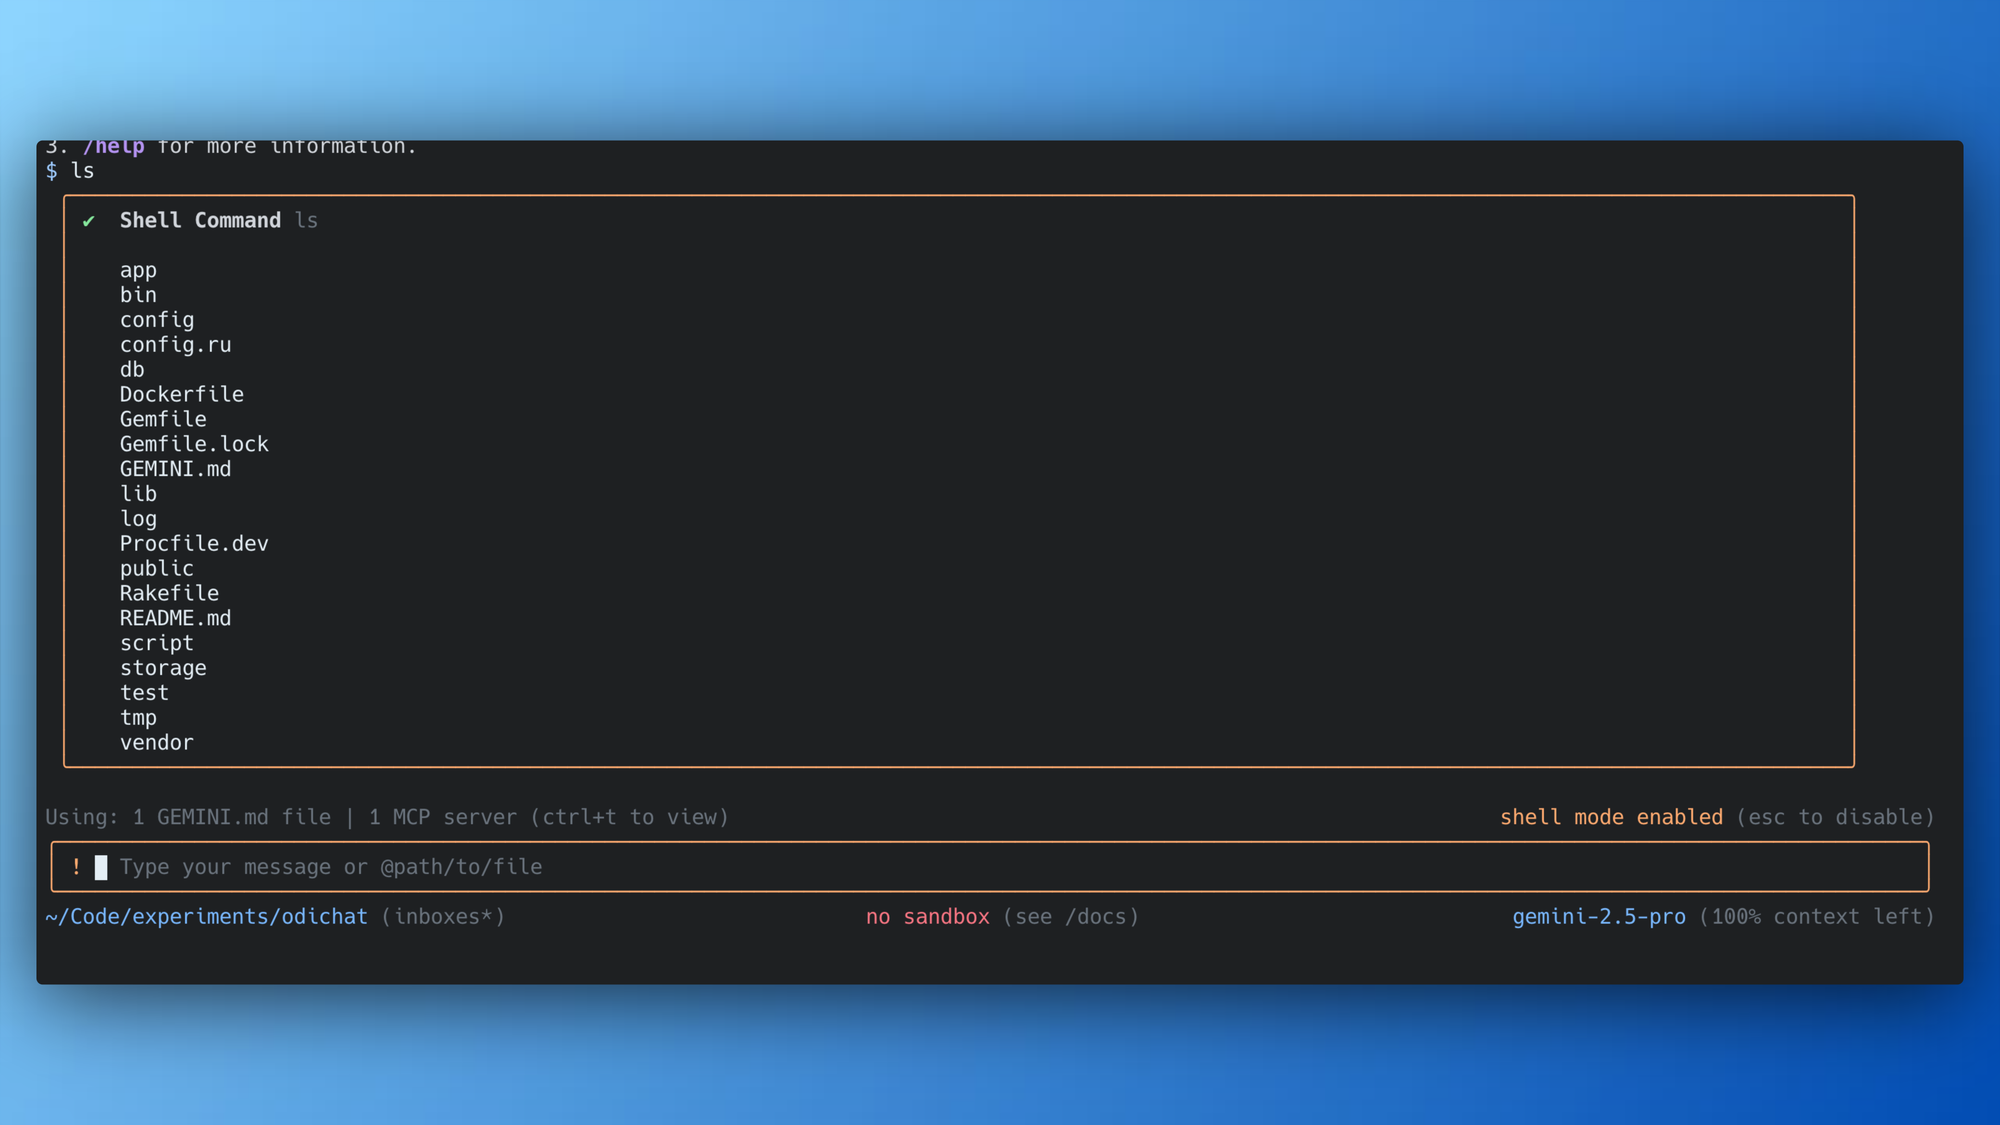
This puts Gemini CLI into shell mode.
Notice in the bottom-right corner of the screenshot, there’s a “shell mode enabled” message.
Once in shell mode, you can type any bash command without the ! prefix. When you’re done, press ESC to go back to interacting with Gemini CLI.
Conclusion
That’s a wrap! Now you know how to get started with Gemini CLI and make the most of it, without spending days tweaking every setting.
There are more advanced configurations, like Custom Commands, that can streamline your workflows. But they fall outside the 80/20 rule we talked about earlier. I’ll cover them in a future post.
If you enjoyed this tutorial, consider signing up for my newsletter to get more guides like this delivered straight to your inbox.
I'll write a post on Gemini CLI Custom Commands, so if you enjoyed this tutorial, consider signing up for my newsletter to get more tutorials like this one directly in your inbox
My advice: progressively explore these agentic coding tools without sacrificing productivity. Remember, done is better than perfect.
To learn more about who I am and what I do:
Check the about page